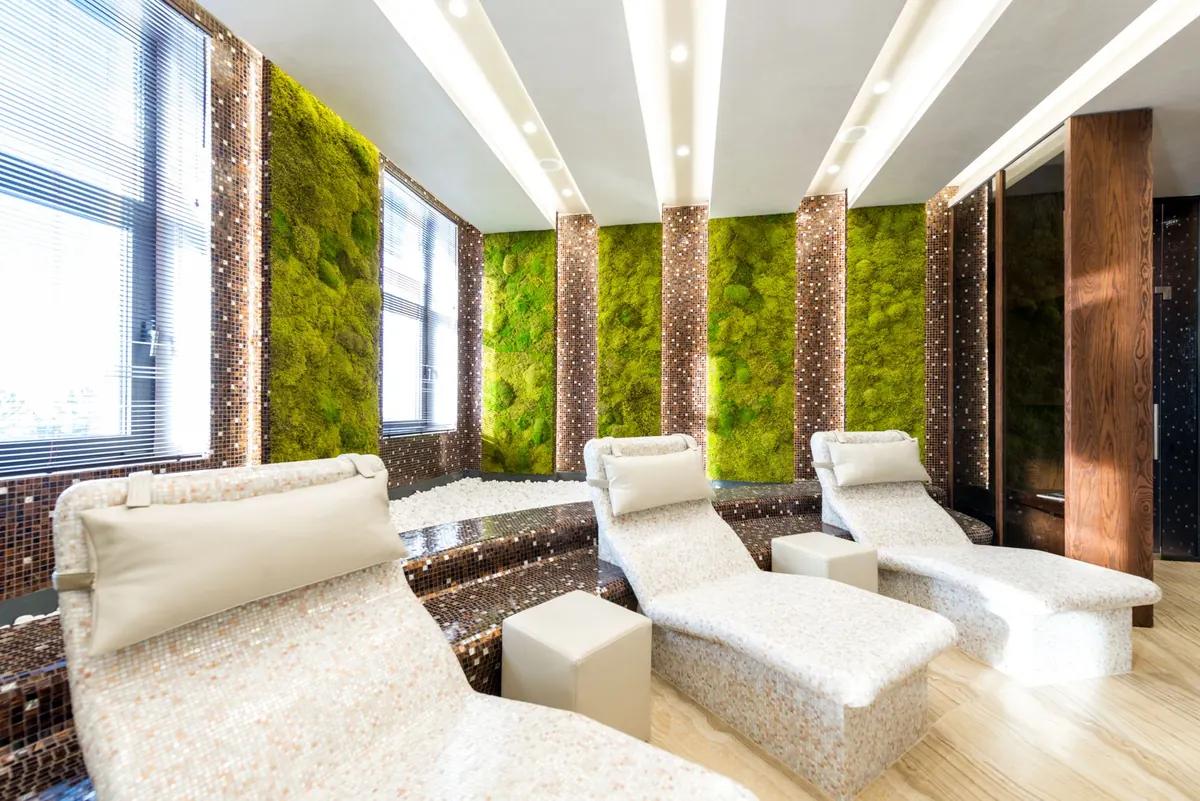
A wall of soft green moss looks like the sort of thing that belongs in a hotel lobby or a design studio with a relaxed attitude to drilling. In a rental flat, it can still be entirely doable. Preserved moss needs no water, no soil and no direct light, and the whole feature can be built on a lightweight backing and hung with fixings that come off again. Done with a bit of care, it leaves nothing behind at the end of the tenancy except a slightly cleaner patch of paint.
Why preserved moss suits a rented room
Preserved moss — sometimes sold as stabilised moss — is real moss that has been treated so it keeps its colour and softness without growing. It is not alive, so it will not die if you forget it, and it does not need a grow light, a misting routine or a drainage tray. That matters in a flat, where a living moss wall would mean irrigation, weight and somewhere for water to go.
It is also comparatively light. A panel around a metre square, mounted on a foam or plastic backing, is usually something one person can lift and hang without a drill. Compare that with a planted wall, which is heavy with wet growing medium and needs fixing into something structural. The preserved version sits politely in the gap between a picture and a piece of furniture, which is exactly where a renter needs it.
Plan the wall before you buy anything
Start with the space, not the moss. Choose the wall, then work out the panel size to suit it. Mask out your proposed rectangle with low-tack tape and leave it up for a week. You will learn quickly whether it crowds a doorway, catches the light badly or fights with a lampshade.
A few placement rules worth following. Keep the centre of the panel roughly at eye height, or slightly above if it will sit behind a sofa. Avoid the space directly above a radiator, the wall behind a kettle, bathrooms, and any wall that feels cold and damp to the touch. Direct sun will fade the colour over a year or two, so a south-facing window wall is not ideal. North-facing is fine.
A ten-minute wall survey
- Press the wall. If it flexes slightly, you have plasterboard. Adhesive hooks work well here; tension poles need a firmer fixing at the ceiling.
- Look for existing fittings. Picture rails, old curtain pole brackets and forgotten hooks are free hanging points. Measure their height and spacing.
- Check for damp. Tide marks, bubbling paint, a musty smell or a permanently cold patch all mean stop. Deal with the cause before you cover it.
- Identify the finish. Matt emulsion is the friendliest. Wallpaper, textured plaster, silk paint and freshly painted walls are the ones that lift.
- Measure floor to ceiling if you might use a tension pole, and note the gap between skirting and ceiling line.
Hanging it without drilling
Work down this list and stop at the first option that suits your wall and the weight of your panel.
- Existing picture rail or hooks. Nothing to remove, nothing to lose.
- A tension pole between floor and ceiling, with the panel hung on it. Excellent for plasterboard and for anyone nervous about adhesive.
- Removable adhesive picture strips or hook-and-loop strips. Best on smooth, clean, cured emulsion.
- Adhesive hooks with a picture wire across two D-rings, so the load is shared.
- Over-door hangers for a small, very light panel only.
Whatever you choose, clean the wall first with a damp cloth and let it dry, then wipe the contact area with an alcohol wipe to remove grease. Press the fixing firmly for the time stated on the packet and wait before loading it. Keep the removal tab accessible rather than hidden behind the moss. Do not use adhesive on wallpaper or on paint that was applied in the last couple of weeks — it will take the finish with it. And use more fixing points than instinct suggests; spreading the load is what keeps a panel on the wall.
Build the panel flat, then hang it
Mounting the moss on the table is far easier than trying to do it vertically. Use a rigid, light backing: foam board for small panels, corrugated plastic sheet for something a little larger, thin ply only if you have a strong fixing. Dry-lay your moss first, mixing flat sheet moss with clumps of reindeer moss for texture, and keep the direction of the growth roughly consistent so the panel reads as one piece. Glue in small sections with hot glue or a specialist moss adhesive, pressing each piece down firmly. Finish the edges with a slim timber or aluminium trim to hide the backing and stiffen the whole thing.
For hanging, fit two D-rings to the back and run a picture wire between them, then hang the wire on a single central hook or pole clip. Keep individual panels to around a square metre and use several if you want a bigger feature. Smaller panels are lighter, easier to level and much simpler to remove.
Damp, mould and the honest limits
Preserved moss takes moisture from the air. That is what keeps it soft, and it is also its weakness. In a steamy bathroom or against a wall with a condensation problem, it can become genuinely damp, and damp organic material is where mould starts. If your flat has had mould, fix the ventilation first and speak to your landlord about the underlying cause rather than disguising it. If you are unsure whether a damp patch is a maintenance issue, it is worth taking advice before you spend money on decoration.
Preserved moss should smell faintly of woodland and nothing else. A sour or musty smell means it is too wet where it is hanging. If your building has requirements about materials in communal areas, ask your supplier for the product's fire performance information before you buy.
Living with it
There is very little to do. Never water it. Dust it every month or two with a soft brush, or a hairdryer on the cool, low setting held at arm's length. Keep it away from radiators, dehumidifiers and humidifiers. If a tuft works loose, a dab of hot glue and thirty seconds of pressure will sort it. Order all your moss at once if you can, because colour varies between batches and a mismatched panel is noticeable.
Taking it down without losing your deposit
Photograph the wall before you hang anything, and again afterwards. When it is time to go, warm the adhesive gently with a hairdryer on low, then pull the tab slowly downwards, parallel to the wall rather than outwards. Clean any residue with warm soapy water or the remover the manufacturer recommends, testing on a hidden patch first. Fill and touch up as needed; landlords often keep a tin of the wall colour, so ask.
If a patch of paint lifts with the adhesive, be upfront about it and offer to repaint that wall. Check your tenancy agreement for anything specific about fixings, and if you are unsure what counts as fair wear and tear, ask your landlord or a tenants' advice service before doing anything you cannot undo. Handled that way, the moss is one of the few decorating decisions you can take with you — and it will look just as good on the next wall.
Photo: Max Vakhtbovych / Pexels