There is a particular disappointment that comes from rushing a terrarium: gravel silting into the substrate, moss scorched on a south-facing sill, condensation so heavy you cannot see the glass. Moss is forgiving once it has settled in, but it is not forgiving about a bad start. Almost everything that goes wrong in month two was decided in the ten minutes before planting. Run through this checklist first and the planting itself becomes easy.
Start With the Container
Decide whether the terrarium will be open or closed before you choose a jar, because the two need different mosses and different care.
A closed container — a lidded jar, a glass sweet jar, a proper glass terrarium — holds humidity close to saturation. That suits mosses from damp woodland, stream banks and anything sold as tropical. It also means you will need to vent it: leave the lid off or ajar for a few hours each week so air moves and mould does not settle in.
An open container dries out fast, and it is the better choice for mosses from walls, paving and lawns — species that are used to drying out and bouncing back.
Look at the neck, too. If your hand will not fit through the opening, every piece will be planted with tweezers: slower, but perfectly doable. A jar of a litre or more buffers small mistakes better than a tiny one. Wash it with warm soapy water, rinse until the water runs clear, and dry it. Tinted or frosted glass will hide the thing you are trying to grow.
Build the Drainage Layer Properly
Even a closed terrarium needs somewhere for excess water to go. Start with a false bottom: two to three centimetres of gravel or pebbles in a jar, more in a large vessel. A thin layer of activated charcoal above it will not rescue a waterlogged terrarium, but it helps keep things fresh-smelling if water lingers.
Then separate the layers. Fine mesh, a scrap of landscape fabric or an old pair of tights stretched across the gravel stops the substrate trickling down and filling the gaps you have just created. Without a barrier, drainage stops working within weeks and the base of the terrarium becomes a bog.
The rule to remember: the water line sits below the substrate, never in it. If you can see standing water above the pebbles, tip the jar gently and pour the excess away.
Mix a Substrate That Suits Your Moss
Moss has no true roots. It anchors itself with fine rhizoids and takes most of its water through its leaves, so the substrate is less a larder and more a damp, stable surface to hold onto. The mix still matters, though.
For woodland and tropical mosses, use peat-free compost mixed with coarse sand or grit and a handful of fine bark or leaf mould — roughly equal parts compost and grit. It should feel like a wrung-out sponge: damp and crumbly, not claggy.
For mosses taken from walls, paths or roofs, go leaner: more grit and sand, less compost. Rich, wet compost is the quickest way to rot a moss that evolved on stone.
Firm the surface gently with your fingers or the back of a spoon, and water it before the moss goes in. Planting onto damp substrate is far easier than trying to water around newly placed moss, which tends to float.
Sort the Light and the Position
Choose the spot before the moss arrives. Moving a planted terrarium is a nuisance, and light decides which mosses will thrive.
Moss wants bright, indirect light. In most UK homes an east or north-facing windowsill is close to ideal, and a west-facing one often works if you keep the jar back from the glass. South-facing means direct sun, which passes through glass, heats up quickly and can scorch moss within a summer afternoon. If that is your only option, use a sheer curtain or set the terrarium at least half a metre back.
If natural light is poor, a small cool-white LED lamp twenty to thirty centimetres above the moss, on for ten to twelve hours a day, is a reasonable substitute. Do not park a terrarium in a dark corner to keep it safe. Moss in low light will not die dramatically; it will go thin, pale and stop growing.
Moss forgives a missed misting, a lean substrate, a jar that is too small. What it will not forgive is an afternoon of direct sun through glass.
Get Water, Humidity and Air Right
Sort out your water before you plant. Rainwater is ideal. Filtered or distilled is next best, particularly in hard water areas, where tap water leaves limescale on the glass and slowly builds up salts in the substrate. If tap water is all you have, let it stand overnight and use it sparingly.
Mist rather than pour. Moss absorbs moisture across its surface, so a light, even misting that wets the leaves is more use than a flood that soaks through to the gravel. Aim for damp, not drenched.
Learn to read the glass. A light film of condensation that clears during the day is normal in a closed terrarium. Heavy fog that stays put all day means it is too wet — take the lid off for a few hours. Dry glass and crisp moss means the opposite. Whatever the reading, open the lid weekly: air movement is what keeps mould from getting a hold.
Tools, Moss Prep and a Bit of Hygiene
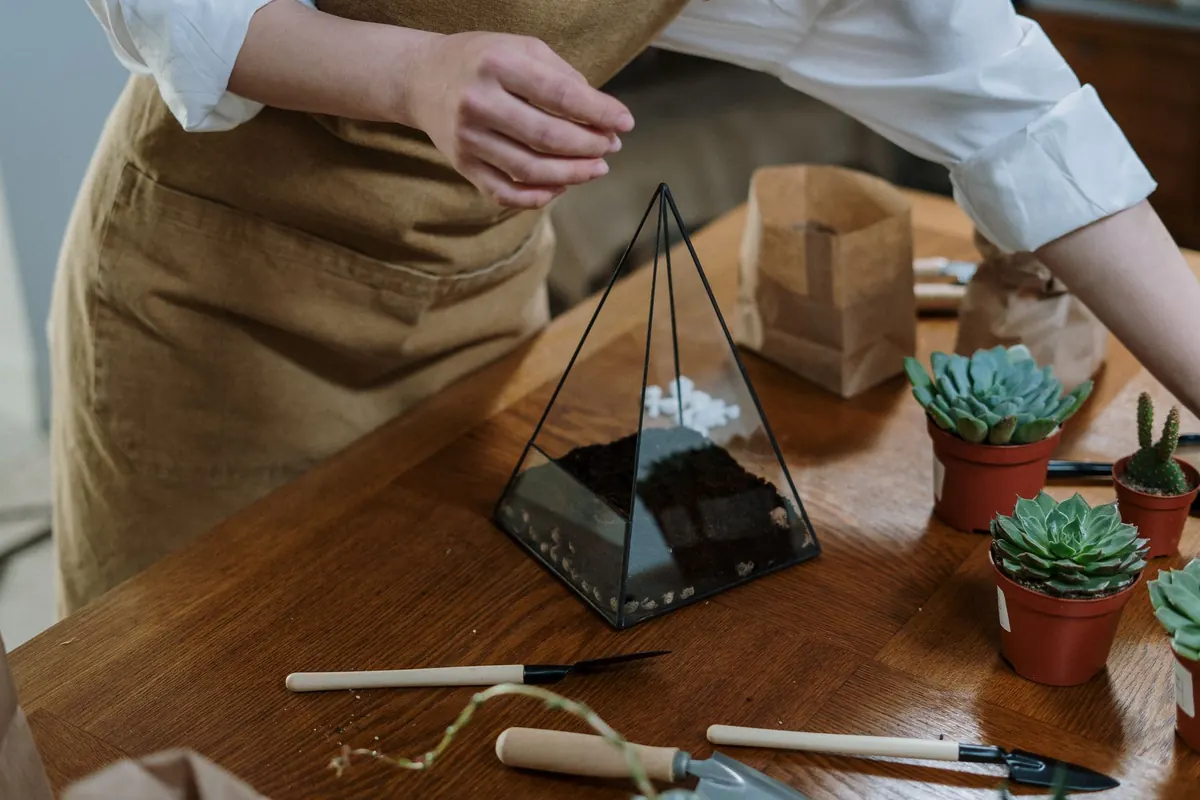
Line these up on a tray before you start. Chasing tweezers around the kitchen with muddy hands is no fun.
- Long-handled tweezers, for placing pieces through a narrow neck
- Fine scissors or nail scissors for trimming
- A fine-mist sprayer, used for water only
- A pipette or small funnel for reaching awkward corners
- A chopstick or pencil for making holes and firming substrate
- A soft brush — a clean make-up brush is ideal — for sweeping glass and tidying moss
- Kitchen towel and a shallow tray to work over
Then check the moss itself. Rinse it in tepid water and look closely for slugs, snails, woodlice, millipedes and egg clusters. Wild-collected moss is worth keeping in a separate tray for a few days to see what emerges before it goes anywhere near your terrarium.
Collect responsibly, too. Moss from your own path, wall or lawn is fair game, but leave nature reserves and protected sites alone, and ask before taking anything from private land. If the moss feels bone-dry, soak it for a few minutes and let it drain. Hydrated moss settles in far more quickly than crisp moss pressed onto dry substrate.
The Ten-Point Pre-Planting Checklist
One last pass, in order:
- Container clean, dry and big enough for the planting you have in mind.
- Open or closed decided, with a lid or a venting plan ready.
- False bottom of gravel in, two to three centimetres deep.
- Charcoal and a mesh barrier added over the gravel.
- Substrate mixed for your moss type, firmed and damp.
- Spot checked: bright, indirect light, no direct sun through glass.
- Water sorted — rainwater, filtered, or stood overnight.
- Tools laid out on a tray, sprayer to hand.
- Moss rinsed, pest-checked and hydrated.
- Layout mapped out, with gaps left for growth.
After that, planting takes minutes: press each piece gently onto the substrate so it makes contact, leave space between clumps, mist lightly, and set the terrarium in its place. Then leave it alone for a few days and watch. New growth starts at the tips, and it is slow — that is rather the point.
Photo: cottonbro studio / Pexels